Instructions of various sofware installation.
Tensorflow
安装
|
|
测试
|
|
|
|
|
|
|
|
|
|
|
|
Gpu
基于tensorflow的keras中GPU的使用ref
|
|
Dlib
|
|
Pytorch
安装
基于Anaconda
|
|
Octave
Ffmpeg
|
|
|
|
Matlab
Anaconda
Installation
Download the Anaconda Bash Script
1curl -O https://repo.anaconda.com/archive/Anaconda3-2019.03-Linux-x86_64.shRun the Anaconda Script
1bash Anaconda3-2019.03-Linux-x86_64.shActivate Installation
1source ~/.bashrcSet Up Anaconda Environments
1conda create --name myenv1 python=3.6
anaconda 2/3 切换
|
|
移动硬盘
用mac磁盘工具,插上移动硬盘,点击抹掉之后,格式选择exfat就可以了。
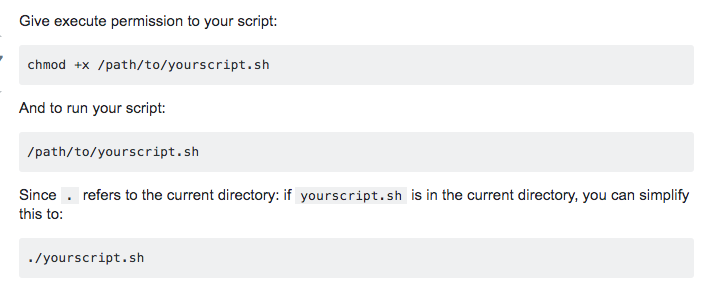
.sh
Colab读文件
首先需要让colab获得google drive的授权,在google colab里执行如下代码:
123456789101112!apt-get install -y -qq software-properties-common python-software-properties module-init-tools!add-apt-repository -y ppa:alessandro-strada/ppa 2>&1 > /dev/null!apt-get update -qq 2>&1 > /dev/null!apt-get -y install -qq google-drive-ocamlfuse fusefrom google.colab import authauth.authenticate_user()from oauth2client.client import GoogleCredentialscreds = GoogleCredentials.get_application_default()import getpass!google-drive-ocamlfuse -headless -id={creds.client_id} -secret={creds.client_secret} < /dev/null 2>&1 | grep URLvcode = getpass.getpass()!echo {vcode} | google-drive-ocamlfuse -headless -id={creds.client_id} -secret={creds.client_secret}执行时会打印一个网址和一个授权码的输入框,此时你需要点击网址,登陆google account,授权colab使用你的google drive,然后系统会分配给你一个授权码,你需要将授权码粘贴到输入框里,回车继续。
关联Google drive
123指定Google Drive云端硬盘的根目录,名为drive!mkdir -p drive!google-drive-ocamlfuse drive此时colab中出现drive的文件夹,里面就是你的google drive的根目录文件
更换工作目录
12import osos.chdir("drive/Colab Notebooks")
Jupyter Notebook
Server
The useful link 1
Usually a remote server is equipped with GPUs. What we want is to run a notebook from server, but have the graphical interface show up in our local machine’s web browser. The libraries, hardware, and all backend-related stuff depends on your remote machine, but the GUI is seen from your laptop.
Set-up: Here, let’s define the local user and host as localuser and localhost respectively. Similarly, let’s define the remote user and remote host as remoteuser and remotehost. Needless to say, make sure that Jupyter notebook and all its dependencies are installed in both machines. Here’s a quick diagram of the whole process, I will discuss them one-by-one in the next section:
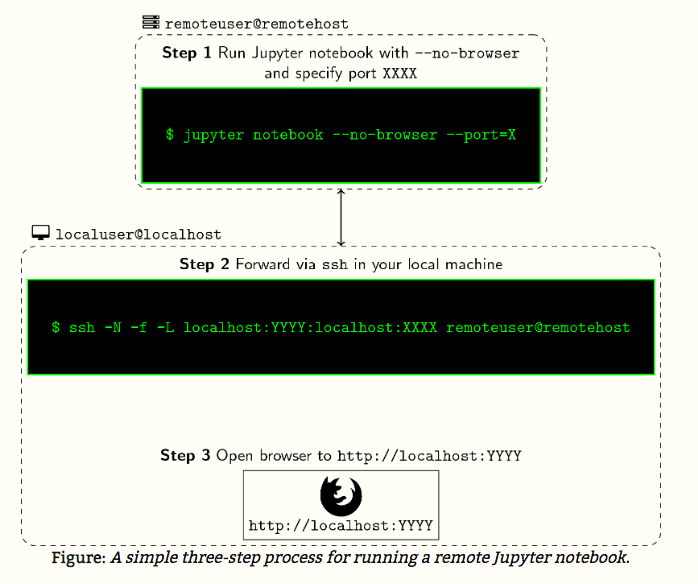
Run Jupyter Notebook from remote machine
Log-in to remote machine the usual way we do. Once the console shows, type the following:
1remoteuser@remotehost: jupyter notebook --no-browser --port=XXXXChange XXXX to the port you want. Usually the default is 8888. You can try 8889 or 8890 as well.
Forward port XXXX to YYYY and listen to it
In your remote, the notebook is now running at the port
XXXXthat you specified. What you’ll do next is forward this to portYYYYof your machine so that you can listen and run it from your browser. To achieve this, we write the following command:1ssh -N -f -L localhost:YYYY:localhost:XXXX remoteuser@remotehostssh -N -f -L localhost:8890:localhost:8888 qwang35@mars.ece.lsu.edu
Fire up Jupyter Notebook
To open up the Jupyter notebook from your remote machine, simply start your browser and type the following in your address bar:
1localhost:YYYY
In your first connection, you may be prompted to enter an Access Token as typical to most Jupyter notebooks. Normally, I’d just copy-paste it from my terminal, but to make things easier for you, you can set-up your own notebook password.
