This is some implementations of create ground truth density maps for crowd counting.
Delta Function
Technically speaking, the Dirac delta function is not actually a function. It is what we may call a generalized function. Nevertheless, its definition is intuitive and it simplifies dealing with probability distributions.
Books
Productivity
Feynman Technique
- The Feynman Technique: The Best Way to Learn Anything
- Learn Anything in Four Steps With the Feynman Technique
Habits
- The single most important change you can make in your working habits is to switch to creative work first, reactive work second. This means blocking off a large chunk of time every day for creative work on your own priorities, with the phone and e-mail off.
- Notice when you seem to have the most energy during the day, and dedicate those valuable periods to your most important creative work. Never book a meeting during this time if you can help it. And don’t waste any of it on administrative work!
Logic
A4纸横放,每张纸写一个主题,1页写4至6行,每行8字到12字,一张纸控制在2分钟之内,每天写10页,即每天用10-20分钟的时间写笔记。
- 写标题和正文时,别思考太多,想到的事,不论是什么,先写下来。
- 严格坚持每页1分钟,一想到就立刻写下来,这会让你不拖延。
- 随身准备好A4纸和纸板,在任何地方都可以写,或者把A4纸折成三折
- 可以把写好的笔记,4-6行的内容做为正文,继续深入下去
- 对于,同一个标题可以用不同的角度来写很多页,处理问题和视野都能扩展开来
Read
- 《放学后》- 东野圭吾
Art
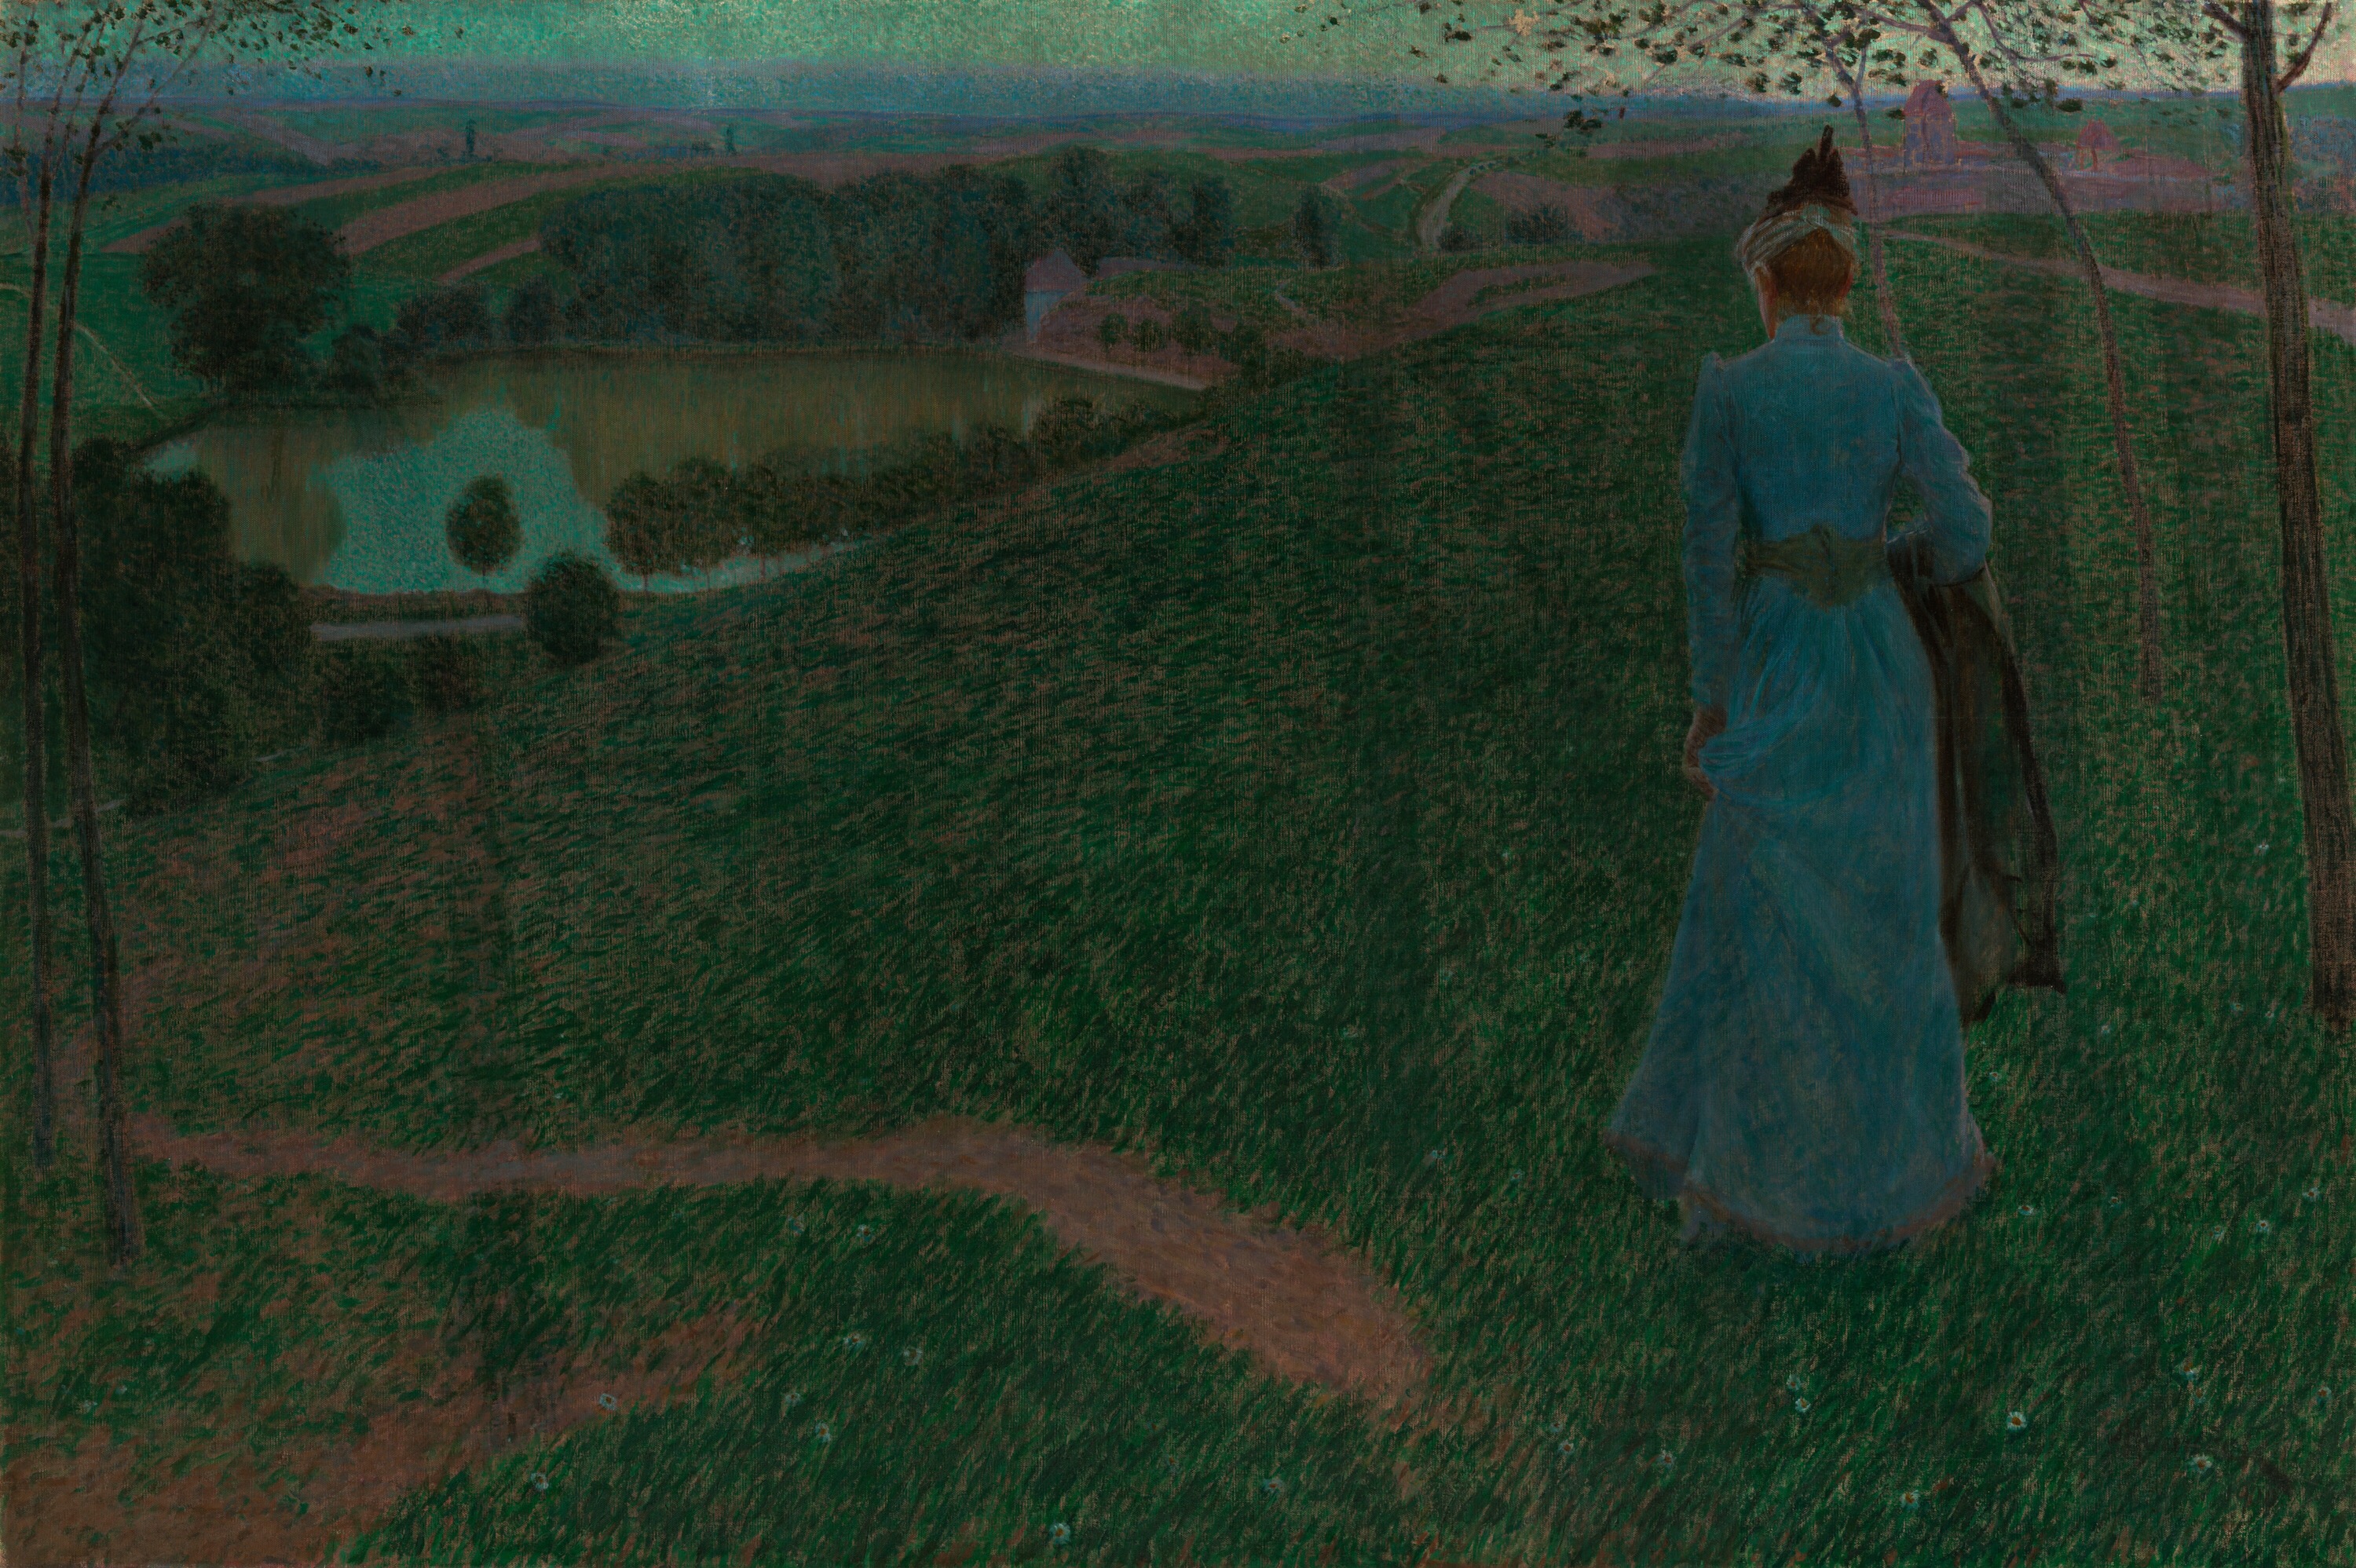
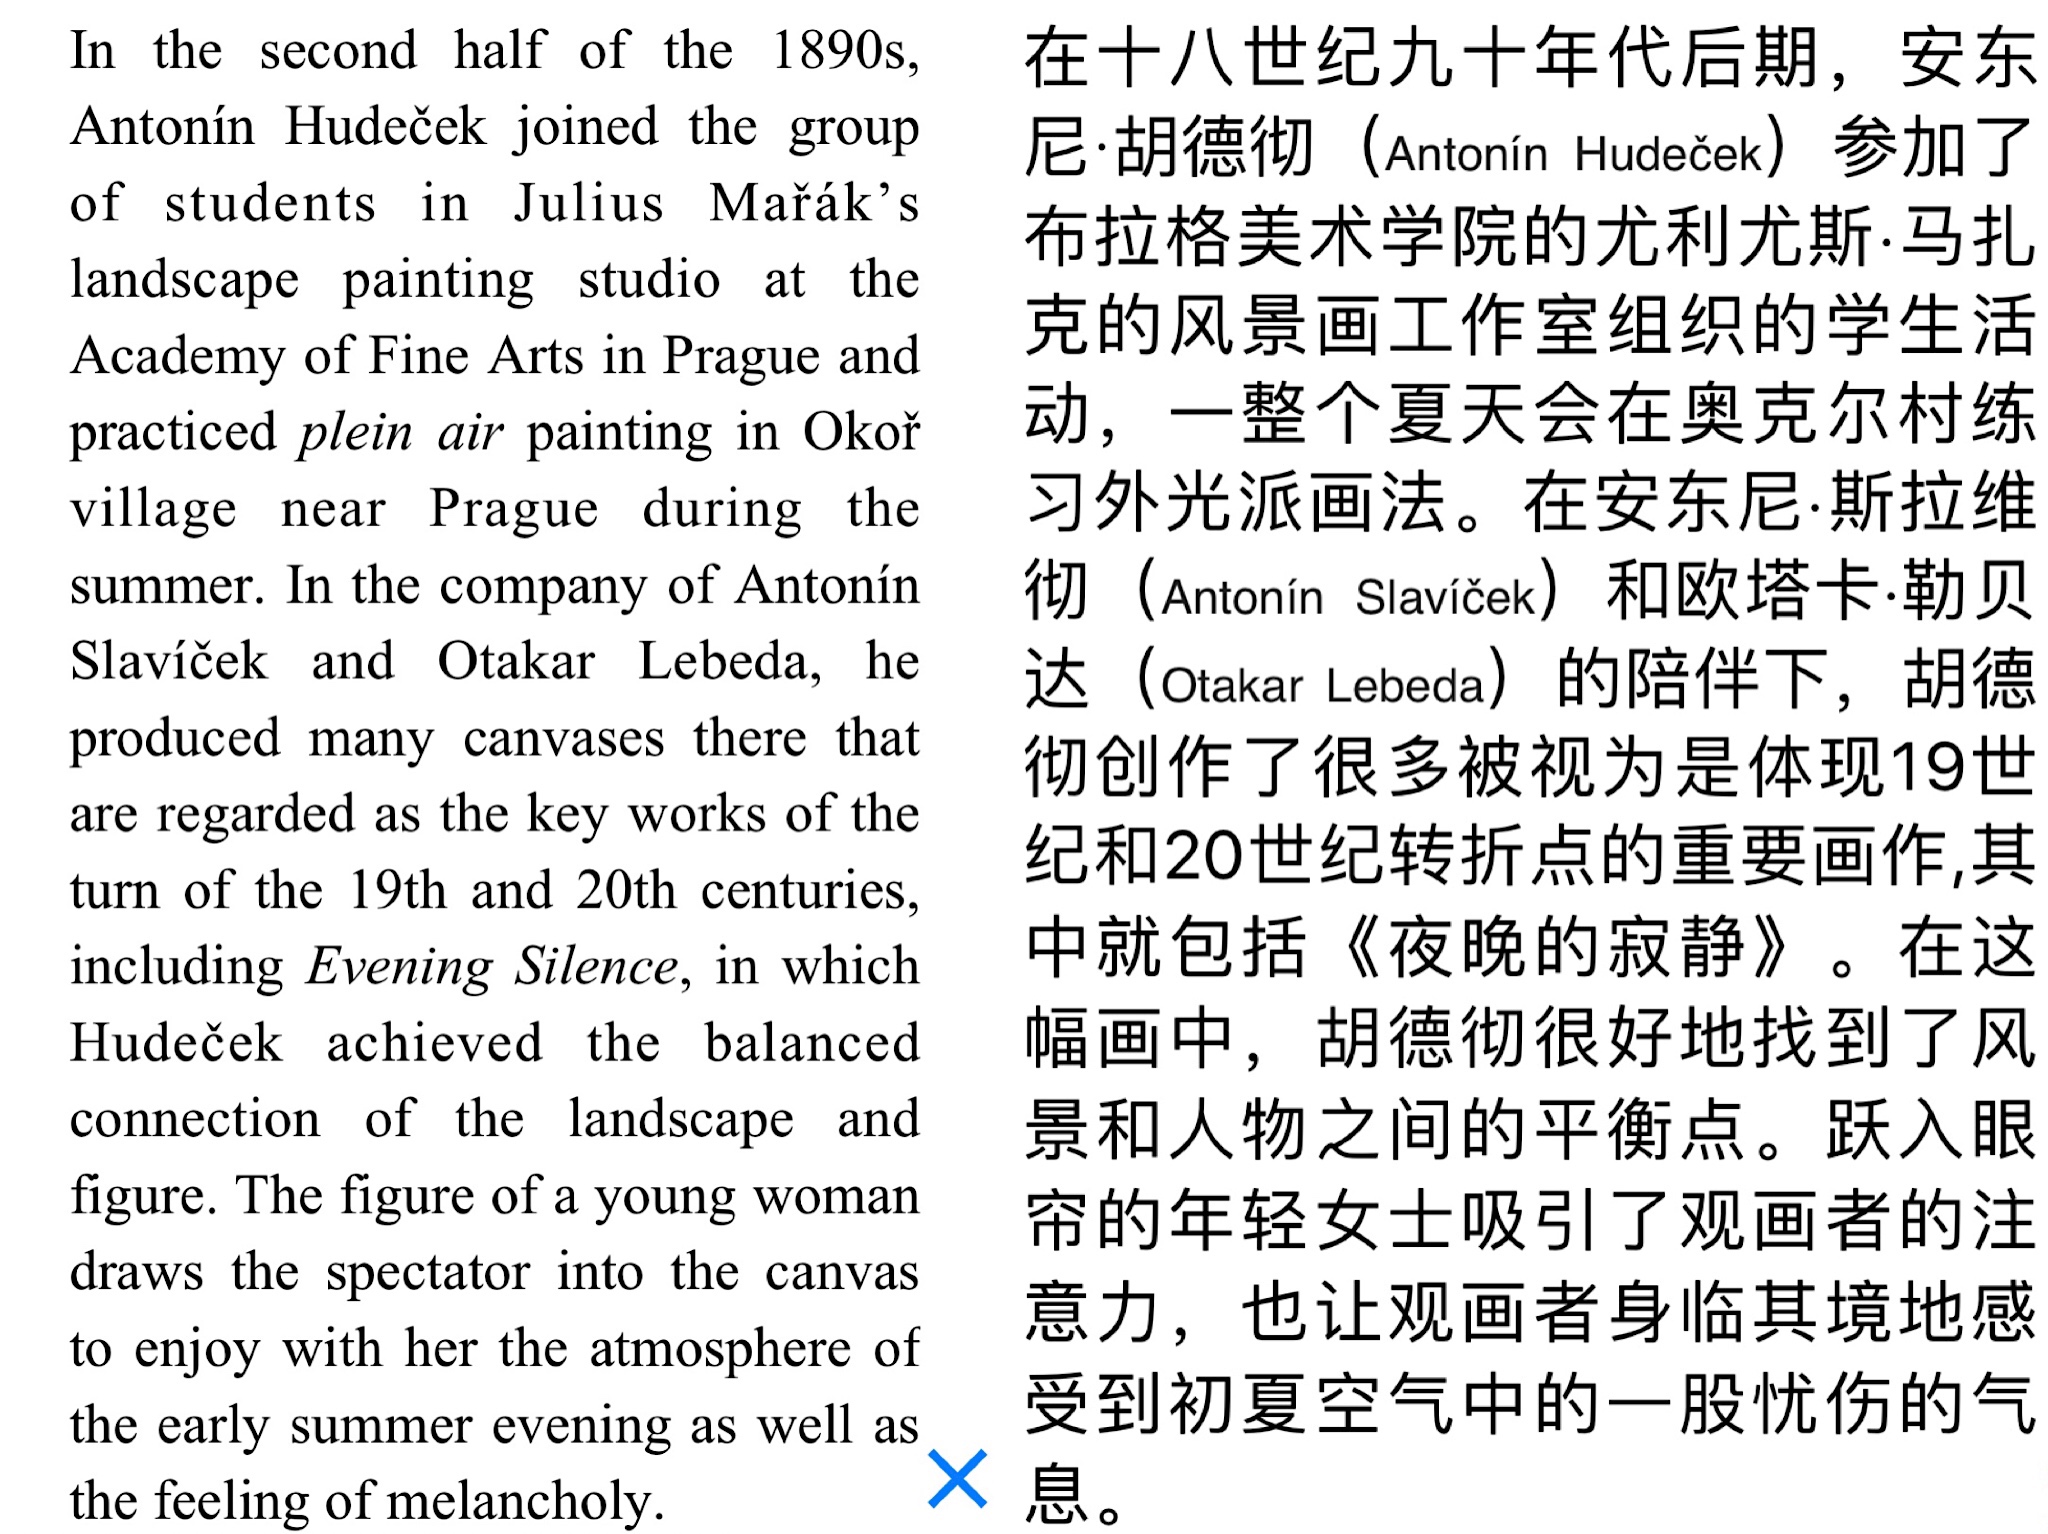
Evening Silence
Image_Processing
CV2
RGB =(height, width, 3)
图片读取cv2.imread()第一个参数是文件路径,第二个参数指定读取方式
|
|
- cv2.IMREAD_COLOR:加载彩色图片,这个是默认参数。
- cv2.IMREAD_GRAYSCALE:以灰度模式加载图片。
- cv2.IMREAD_UNCHANGED:包括alpha。
- 上面三个flag分别对应的值为1,0,-1
使用cv2.imshow()显示一个图像窗口,窗口大小根据图像自动调整。第一个参数是窗口名称,第二个参数是图片。
使用函数cv2.imwrite()保存图像到文件,第一个参数是文件名,第二个参数是你要保存的文件
使用cv2.resize(img,(width, height))来改变图像大小。
VIDEOS
从视频中提取帧 ref
|
|
|
|
Depth Images
Loading and Visualizing Kinect Depth images in Matlab
MSR3D-Daily Activities Dataset
|
|
DP-Crowd Counting
Q
About perspective normalization, the closer the people is to the camera, the bigger he is. So the weight should be small, which is consistent to the paper. While in paper, the closer people is, the hotter the color, meaning bigger weight of people close to camera.
down-sample the training pics by $\frac{1}{4}$ before training, it wouldn’t change the density?
delta function to model the image with $N$ heads?
CNN based
DP-CNN
Q
比如S2 -> C3,是不是C3的每一个感受野要感受S2的6张map?
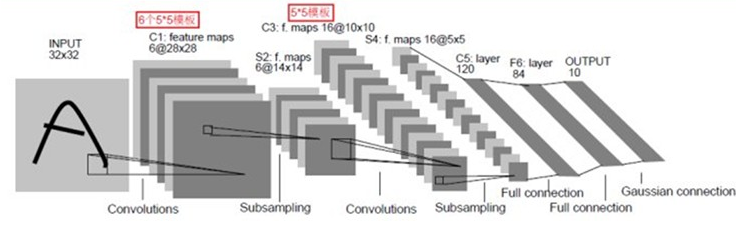
事实是:每一个卷积核要感受前一层的所有feature_maps
卷积神经网络(Convolutional Neural Network, CNN)是深度学习技术中极具代表的网络结构之一, CNN相较于传统的图像处理算法的优点之一在于,避免了对图像复杂的前期预处理过程(提取人工特征等),可以直接输入原始图像。
图像处理中,往往会将图像看成是一个或多个的二维向量,比如MNIST手写体图片就可以看做是一个28 × 28的二维向量(黑白图片,只有一个颜色通道;如果是RGB表示的彩色图片则有三个颜色通道,可表示为三张二维向量)。传统的神经网络都是采用全连接的方式,即输入层到隐藏层的神经元都是全部连接的,这样做将导致参数量巨大,使得网络训练耗时甚至难以训练,而CNN则通过局部连接、权值共享等方法避免这一困难。
Why using the patches of images as input instead of the whole images?
I saw this phenomenon when I read papers about crowd counting with CNN, like S-CNN MCNN. And according to the paper S-CNN, the complete image is divided in 9 non-overlapping patches so that crowd characteristics like density, appearance etc. can be assumed to be consistent in a given patch for a crowd scene.
What is fine-tune of CNN model? fine tuning
如何理解“卷积运算,可以使原信号特征增强,并且降低噪音”??
为什么神经网络可以提取特征??
模型的鲁棒性????
A
In machine learning terms, this flashlight is called a filter(or sometimes referred to as a neuron or a kernel) and the region that it is shining over is called the receptive field.
A very important note is that the depth of this filter has to be the same as the depth of the input (this makes sure that the math works out), so the dimensions of this filter is 5 x 5 x 3.
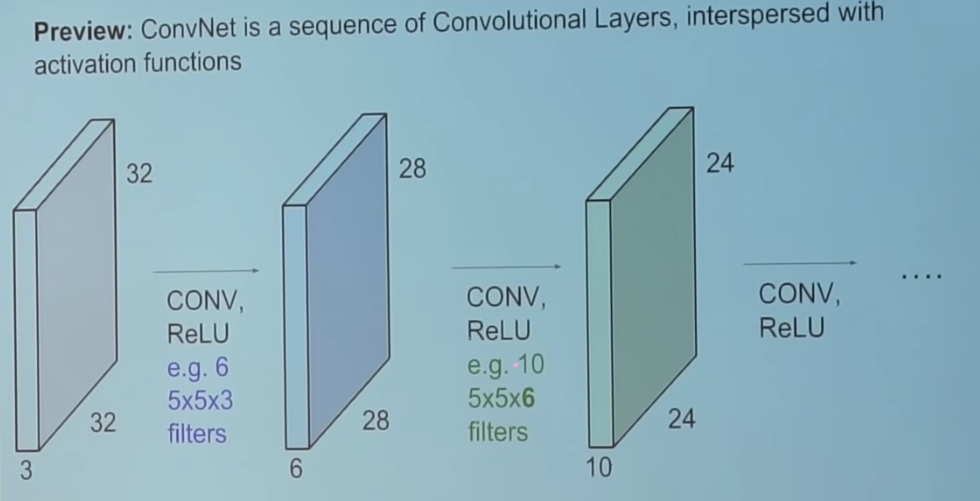
For an input image with size $N \times N \times C$, after going through a filter $5 \times 5$, we have an output feature map with size $(N-5+1) \times (N-5+1) \times 1$.
output_size = (Height-Filter)/stride+1.
weight number

$1 \times 1$ filter size
